Category: Maple Syrup

maple muffin

All Things Maple Syrup

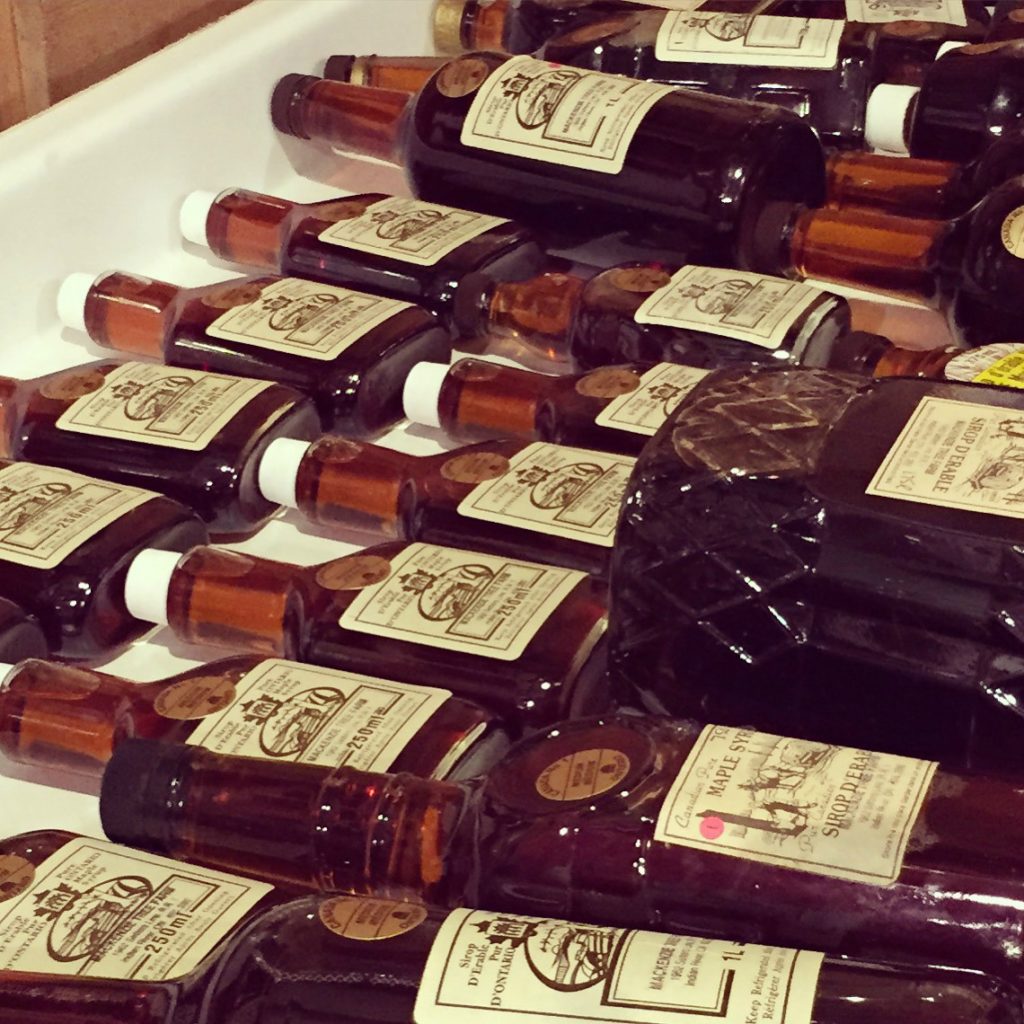
During maple syrup season (aka spring) there are always dribs and drabs of syrup sitting around that I need to use up … bits that are leftover after bottling since it never works out evenly. And so I make stuff with it. And no one complains. Currently there are 4 partially filled jars of syrup on my window sill that I need to use up. It’s a horrible problem to have, isn’t it? 

In this post I will share FIVE of my favourite recipes for using up maple syrup. (There are more, but I’m limiting myself today.)

Top usage, of course, is as syrup. DUH. Around here we pour it on pancakes, waffles and french toast – but we don’t leave any on the plate. That kind of waste of the golden elixir is strictly prohibited. My dad used to always pour it on vanilla ice cream and bananas, but none of my kids have found that to be particularly appetizing. They do love weekend breakfasts that involve maple syrup… with pancakes, waffles, or french toast.  Any of those will do. They’re all quick and easy, and adding a bit of fruit makes me feel like I’m not a bad mother. 

pancakes
hydrotherm
french toast

(I threw a hydrotherm photo in there for you scientific sorts.)

Here’s the pancake recipe – it’s so quick and easy. You may just never use a boxed mix again. We shall see. 

Basic Pancakes
A simple, fluffy and quick pancake recipe. Great for weekend breakfasts.
Write a review
Print
Ingredients
  1. 1 cup all purpose flour (a little less if unsifted)
  2. 2 tsp. baking powder
  3. 1/2 tsp. salt
  4. 2 tsp sugar
  5. 1 egg
  6. 1 cup milk, soured
  7. 3 Tbsp. melted butter (you can use margarine or shortening, but why?)
Instructions
  1. Mix dry ingredients together.
  2. Beat eggs. Add milk and melted butter.
  3. Add wet to dry. Mix. Add more milk if you are making waffles.
  4. Let sit a bit, then make your pancakes as you do!
Making it Work https://pioneerintrees.com/
I’ve already written about Deborah’s famous granola … it’s truly amazing. If you haven’t made it yet, I HIGHLY recommend it.  It’s the kind of recipe that you make and put in a cool little jar and then take to someone’s house when you’re visiting and then they love you even more.

granola
Truly the most delicious granola EVER!

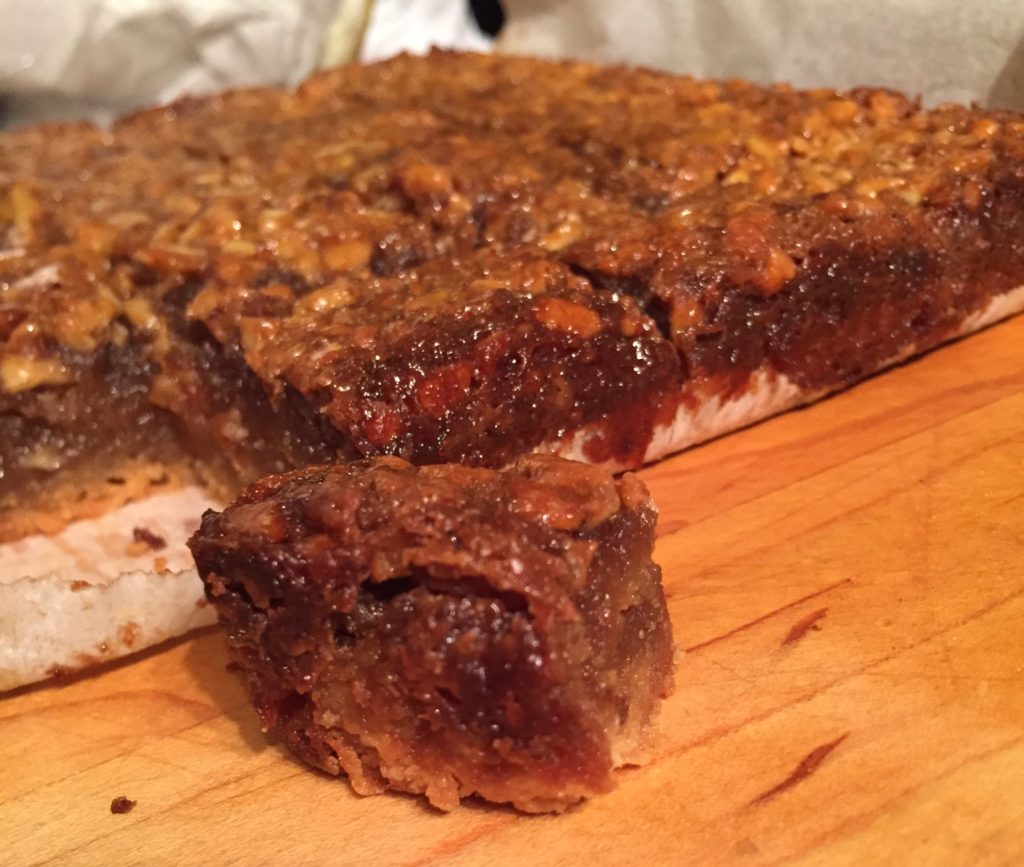
And I showed you the brilliant maple bars a while back. They keep well for a few days and impress the hell out of anyone who shows up at the door for a cuppa. 

maple bars
These maple bars are so freaking good – but they will stick to the pan and ruin your day. Use parchment.


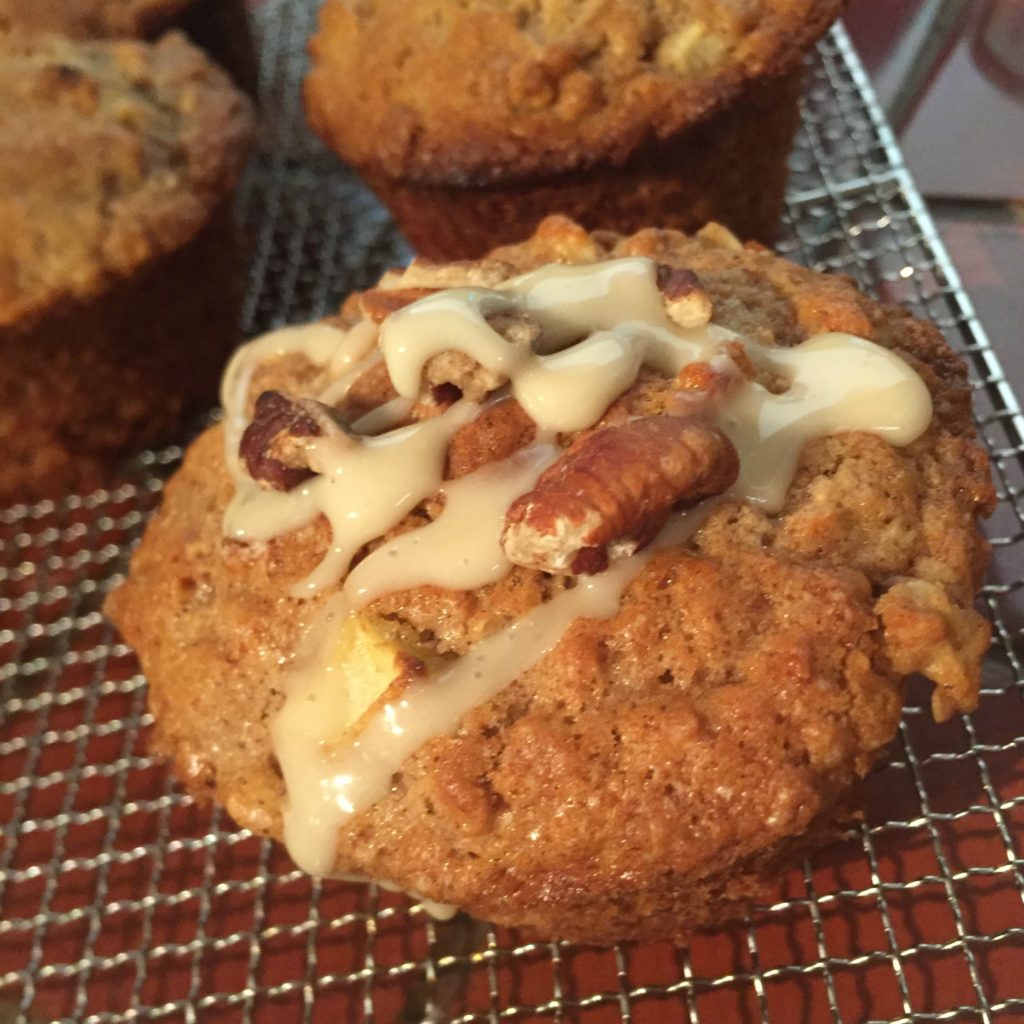
This year Dave at Squirrel Creek Farm Services (best place to get all of your maple syrup supplies) gave us a new ‘all things maple’ cookbook and there’s a pretty lovely muffin recipe in there. I figured it was just perfect this week for Wendy. The first time I made them they were a bit ‘meh’ … they seemed a bit dry. I definitely made them too small. I was more careful with baking time, added better apple (granny smith this time) and watched my mixing technique just in case that was the culprit. Waddayaknow, they turned out pretty freaking AWESOME! (You really should make them. Who doesn’t have maple syrup and an apple laying around?) 

maple muffins
A little drizzle on top with some toasted pecan pieces? BAM. So good!


Maple Drizzled Apple Muffins
A tasty maple flavoured muffin that is also gorgeous to look at!
Write a review
Print
Ingredients
  1. 1 1/3 cups all purpose flour
  2. 1 cup rolled oats
  3. 1/2 cup white sugar
  4. 1 Tbsp baking powder
  5. 1 1/2 tsp cinnamon
  6. 1/2 cup milk
  7. 1/3 cup butter, melted
  8. 1/4 cup maple syrup
  9. 2 egg whiles, lightly beaten
  10. 1 cup chopped apple (granny smith are awesome)
  11. pecan halves or pieces for the top
  12. Glaze
  13. 3 Tbsp icing sugar
  14. 1 Tbsp maple syrup
Instructions
  1. Preheat oven to 400ºF. Prep your muffin tins (butter, spray or line with paper cups).
  2. Combine first 5 ingredients in a large mixing bowl. Mix well.
  3. In a separate bowl combine milk, butter, maple syrup and egg whites.
  4. Pour the wet into the dry ingredients and toss the apple bits in there too.
  5. Stir only until moistened. DO NOT overmix. Thank you.
  6. Fill to top of muffin cups - you'll have about 9 big muffins.
  7. Bake for 18-20 minutes.
Glaze
  1. Blend together the sugar and maple syrup. Drizzle over the muffins when they are cool. Toss a couple of pecans on there and drizzle again for good luck.
Making it Work https://pioneerintrees.com/
One more recipe that I MUST share with you that I found it in a newspaper years ago is a frozen mousse. You really need to make it in the morning if your’e serving it at night, since it needs to FREEZE UP. (I often forget that part.) All you need are: maple syrup, whipping cream, eggs. Ta da! (ok, it’s a bit fussy, I’ll admit… but it’s worth it) 

maple mousse constructing
maple mousse done
plated maple mousse

I love to serve it with a ginger pound cake. It’s a great combo. I’ll do a post about that another time … 

Maple Syrup Mousse
A light and delicious frozen maple dessert.
Write a review
Print
Ingredients
  1. 1/2 cup maple syrup
  2. 2 eggs
  3. 1 cup whipping cream
Instructions
  1. Heat the maple syrup until bubbly.
  2. Separate two eggs.
  3. Put the egg yolks in the top of a double boiler and whisk thoroughly.
  4. Add hot syrup. Whisk until it thickens to coat the back of a wooden spoon.
  5. Cool.
  6. Beat egg whites until stiff.
  7. Whip cream until firm.
  8. Combine all three and mix.
  9. Put in a dish and freeze.
  10. Take the mousse out of the freezer and put it into the fridge one hour before serving.
Notes
  1. This is a good recipe to make the day ahead!
Making it Work https://pioneerintrees.com/
bottles

Maple Syrup Time Again

Even though day 1 of spring is officially tomorrow, we had a prelude to a spring a couple of weeks ago and as a consequence we have already made 101 litres of maple syrup. I know. That’s a lot of pancakes. But apparently we need more, so I’m heading out shortly to check the lines and collect sap. Before I do that though, I’ll give you a bit of an overview of the operation – purely hobby, by the way, so some of my methods / tools may be a bit questionable to a pro. (And if you work for the CFIA, stop reading this now, because I only sell syrup to friends and family. Thanks very much. Goodbye.)

We (ok, my brother) tapped in mid February this year. It’s a bit of a risky move, because your tapped holes can dry up if there is a long freeze in between runs. We He went for it. He’d collect and boil in the day, I’d come home from work and finish the boil. We’d try to do finishes together, but it didn’t always work out. (Of course, in the March break, when I had LOTS of time to boil and finish, it didn’t run.)

Let me take you through the process with the help of some photos I’ve taken over the years. 

When we’re ready to tap the lines they are already hanging from the trees since we leave them up year round. There is usually some damage to the lines – the deer sometimes like a nibble – so fixing the lines is often necessary. 

tap and fix
We generally fix and tap at the same time, working our way up the line. Hot water, extra tubing and taps are necessary, as is the handy and very sharp knife. 

Tapping takes a day or two – we tap about 300 trees … and several trees have more than one tap. Most taps are connected to tubing (various colours). We do have 20 or so buckets that we use around the house where I don’t want to hang tubing. I can also ask visitors to collect sap from the buckets. It keeps them happy. 

drilling
You need to drill on a slight upward angle. Tony’s a pro.
tapping
Vintage photo of Liam putting the tap into the freshly drilled hole. Afterwards it is hammered in. 
spile
The spile has a wee trough, a hook and a hole for the lid pin to go through. Clever.
After you hang the bucket on the spile you have to attach the lid with a long metal pin. It’s a bit tricky.
drip
Once the tree has been tapped and the spile hammered in, the sap runs immediately.

The tubing runs downhill and into jerry cans that collect the sap. These were a brilliant choice by my dad as the tubing fits perfectly into the vent hole.

saplines
We stretch the lines starting at the bottom of the line, tapping as we go, and raising the line up the trees so that the sap can run easily down the line and into the container.

We collect the sap by exchanging the full cans with empty ones. They conveniently fit in the back of the gator. Clever, eh? 

gator
Cousin Tim jets around to collect. There’s a job for everyone!
night
If the temperature stays warm the sap will run at night. So we collect at night. The coyotes can freak you out a bit…

The sap is then transferred into big stainless steel containers. We have about 400 gallons of storage space. 

sap
The sap is poured through the first of many filters.

Once we have enough sap to boil, we light up the fire in the sugar shack and feed the sap down through handy pipes. 

shack
You can see the pipes go into the shack right under the obligatory OMSPA sign.

The procedure in the sugar shack is pretty basic. Boil the hell out of the sap until all that’s left is syrup, then filter it and bottle it. The machinery is pretty spectacular though! 

pans
These lovely pans make incredible syrup. They’re made in Quebec by the pros.

The slow work is feeding the fire, skimming the foam, checking the levels and collecting more sap. As it boils down we pull small batches into the finishing pan which sits beside the evaporator pans. Once we have enough to finish (around 26 litres), we light up the propane under finishing pan and prepare to do a “finish”. 

skimming
As the sap boils in the upper evaporator pan, we skim off any foam that builds up.
fire
Keeping the boil high is important. We have varying theories on the best way to achieve this. I am right of course.
filter
Once the syrup sap reaches a certain temperature in the lower evaporator pans we pull it off, filtering it as we do so into the finishing pan. This is the second filtering. It’s critical. See the sediment?

This final part is the art of it all. The syrup is boiled in the finishing pan until a certain temperature is reached. This stage of the work involves beautiful caramel bubbles, measuring the Brix (sugar content) with the hydrotherm and taking it off at just the right time. The syrup is poured through its final set of filters as it goes into the bottling pan. 

caramel
final filter
done
hydrotherm

If you boil the syrup too long and the sugar content is just too high, the syrup will crystallize. Even though it’s pretty and can be used to teach Grade 4 kids in their rocks & minerals unit, it’s a waste of syrup and very disheartening. I’ve become better at finishing now, so I haven’t had crystals in a few years. 

These are my sample bottles that sit in the window. One sample for each finish. The crystals formed within a month.

Making maple syrup is a LONG process. Fun fact: it takes 40 litres of sap to make 1 litre of maple syrup. That’s why it’s a labour of love, and why I’ll smack you if I ever see you leaving maple syrup on your plate. 

Baking with Maple Syrup

Nothing like starting the day at the cabin with pancakes and maple syrup! It made me think about what else I can make with maple syrup today. Checked my recipes and pins and decided to whip up a batch of Maple Syrup Bars for my secretary’s birthday tomorrow. The bars are basically butter tarts in square form – much easier than making pastry.

Simple crust – flour, butter, sugar. Press it in a parchment lined pan (critical, believe me).

Simple filling – maple syrup, sugar, walnuts, butter, egg, bit of flour + salt. Bake it up and BINGO! Wonderful treat to share with those you love.

http://www.simplystacie.net/2014/08/maple-syrup-bars/

Lunches. Suck. 

It’s the night before the first day of school all across Ontario. Kids are irritated that their summer is over but they don’t have to give a crap about lunches because at this stage of the game the parental units are feeling generous with their time and making lunches that their kids might actually like. Truth.

In this household we started with the obligatory chat on the way home from the cabin. “So, what might you want to have in your lunches this year?” Yawning silence. Best friend of 14 yr old daughter says “well I can tell you all of the things she eats out of MY lunch…” OMG why the hell didn’t I think of that LAST year?? Turns out: pasta salad and perogies are favorites. Who the hell would guess that?? Jeez.

So tonight I embark on making pasta salad all 3 of us will like. It goes like this:

No dressing for the 12 year old. Add dressing and tomatoes for the 14 year old. Add peppers for me. Done.

Then I decided that muffins would be a good idea, so I whipped up a batch of blueberry lemon muffins. The kids have both stolen one and they’re ‘good’. Gee thanks.

img_0807
Love the Pampered Chef muffin pan … makes pro muffins every time.

Finally, I need granola for my own personal survival. I like it with yoghurt and whatever fruit I can salvage. It’s the perfect thing to keep at work and eat whenever I have the chance. This granola is a Deborah recipe … made with coconut oil and maple syrup and cinnamon and a dash of cloves … nice and crunchy and flavorful. I will give you the recipe for this one since it’s insanely good – not like that lame-ass orzo salad that I hobbled together with whatever was in the fridge…

After tomorrow’s lunch everyone is officially on their own. It’s all downhill from here.

You’ve Gotta Be Nuts Granola (odd title, but bear with me)
In a large bowl mix:
3 c large flake oatmeal
1 c slivered almonds (I used sliced, whatever)
1/2 c raw pepitas (pumpkin seeds)
1/2 c raw sunflower seeds
Reserve: 1 c raw pecan halves (you’ll add this to the whole mixture after 15 minutes of baking time)
Melt together:
1/4 c coconut oil
1/4 c butter
Add: 1/4 c maple syrup
1/3 c brown sugar
1/2 tsp ground cinnamon
1/4 tsp ground cloves (go with it)
1/8 tsp salt
Pour the wet ingredients over the dry, mix. Spread onto a parchment paper lined baking sheet. Bake 15 minutes at 325 degrees (where the hell is that symbol on an Apple keyboard? Wtf). Add pecan halves and toss. Bake another 15 minutes or till the stuff at the edges is looking dangerously brown. Cool. Store in an airtight container. Eat it and share it and be the granola boss.

Another Bourbon Experiment


In keeping with my bourbon focus, I put the following search into Pinterest: appetizers, bourbon, savory. Came up with a whole host of very yummy looking things. I wanted to make a chutney or something with cream cheese – something spreadable. After scrolling through, I settled on Bourbon Bacon Jam since I had most of the ingredients at hand. Here they are:


image
Had to substitute vidalia onion for shallots.
Pretty standard ingredients, and easy to make – all you need is time to cook up the bacon, then onion and garlic, and finally simmer it all down.

Finally, after about an hour and a half it seemed jam-like. Too hot to taste so I just went with it and watched the consistency.

Meanwhile, I needed to figure out what to serve this jam ON. I thought that mini tea biscuits might be easy enough. Since I had time while the jam was stewing away, I decided to try out a new recipe. I use shortening in my “baking powder biscuits” recipe but wanted to try one that used shaved frozen butter. I’ve heard they’re MUCH better. Back to Pinterest for a recipe and off I went.

Turns out, the shaving frozen butter trick is excellent. I’m never going back. (Unfortunately I cut the shit out of my finger when I was trying to get the last bits of butter out of the grater… I have a love-hate relationship with graters.)

Taste-wise, the overall result is VERY good! Hard to describe, but overall, a deep sweet meaty flavor. Like sticky ribs. Paul moaned when he tried it. Lol

image
Buttermilk tea biscuits and bourbon bacon jam.
Here are the links to the recipes:

http://www.savoryexperiments.com/bourbon-bacon-jam/ and http://foodlove.com/fool-proof-buttermilk-biscuits-from-scratch/