Year: 2017

Blueberries

Blueberry Picking as a Competitive Sport

This summer has been a banner year for blueberries – lots of blackflies in the Spring to pollinate, and lots of rain to help them grow. As a consequence I have been involved in several blueberry picking expeditions here at the lake. Each time I was out there I thought about blogging about it – it’s a fascinating activity, after all…

If you’ve never picked blueberries, read on. You might learn something about the sport art of blueberry picking. If you have, well, you’re not going to learn anything, but you might have flashbacks. Sorry. 

It all starts when you pick up the elders others who are going to join you. Choose carefully. You must like them a lot, and they must either know “the code” or be able to pick up on “the code” without being told directly. (Ok, from now on just do air quotes whenever I say “the code”.) If they don’t know the code, you’re in for a very irritating experience. The two elders in this photo taught me the code, so they’re cool. 

Elders
Liz & mom – experienced elders! 

Then you have to go to the secret location. If it’s not secret, you’d better hope you’re first, otherwise, you’re pooched. The best berries will be long gone. After a few days of berry picking season, once others have also started, you really need to start to investigate the crown land (don’t ever pick on someone’s property, even if they’re related … picking someone else’s berries is tantamount to theft and you will go straight to hell). If your fellow pickers are a bit more lithe (under 65 is good) you can have them hop out of the boat and do a quick looksee. This is what you want them to see:

Bushes
Blueberry bushes at the beginning of the season – we knew there was lots of good picking to come!

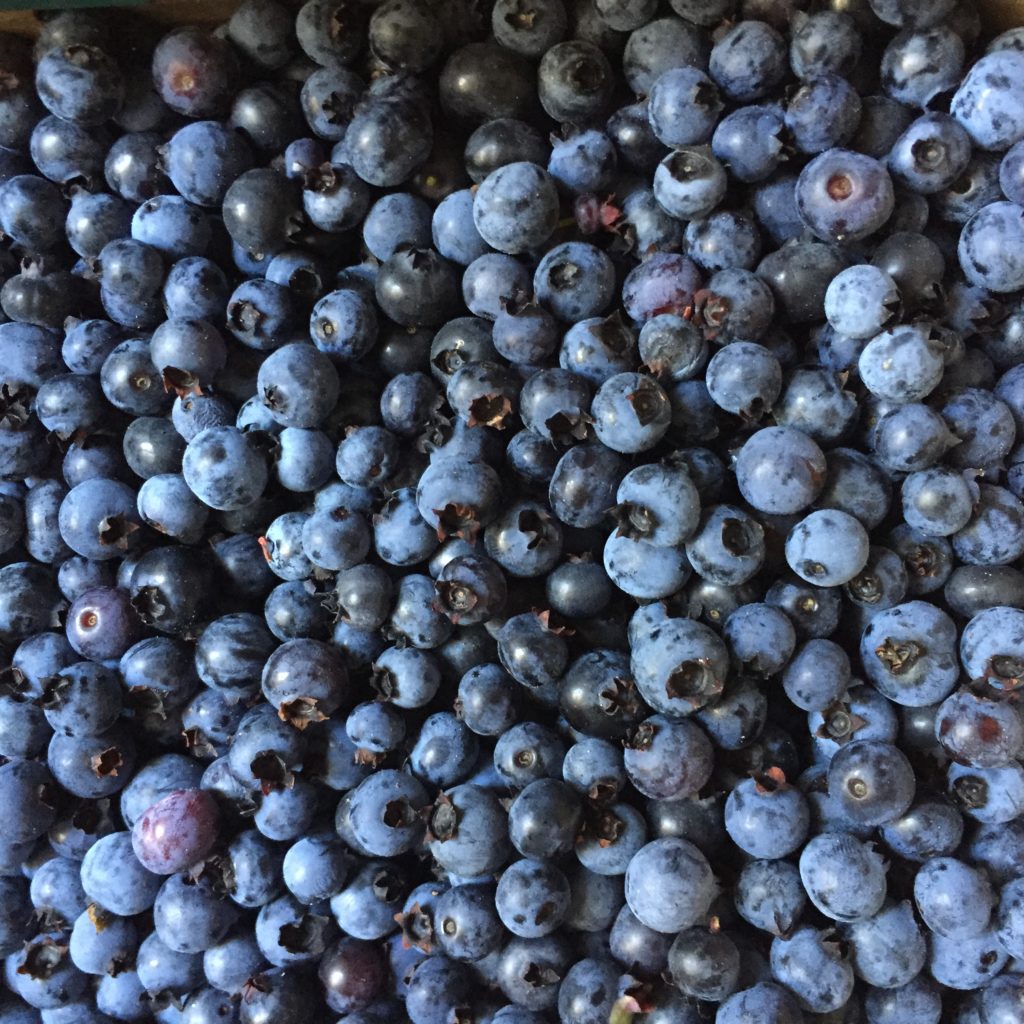
There needs to be a LOT of berries to make it worthwhile – or at least a reasonable amount of BIG berries – otherwise it’s not going to be a long berry picking session. 

Note: Leave your phone in the boat or you will be treated as a teenager, chastised for being tethered to your phone (and the temptation to take photos will slowly overpower your will to keep picking, let’s face it…). 

Once you’re out there picking, you’d better have a lot to think about, because it’s fucking boring as hell. It takes a LONG time to pick blueberries, even when they’re big. And if the boredom doesn’t get you, there are other things that will:

– the incessant chatter of the person close to you

– the fact that someone has come along and has started picking IN YOUR PATCH (this only happens with rookies) – when that happens, try not to lose your mind – just move on gracefully, you can be mature! 

Quart basket
Everyone has a favourite picking container. Quart baskets do nicely. But no handle …

– the insidious heat (berries like the sun, and since part of the code is to wear long pants & shirts, shoes and a hat, you’re going to be dying)

– the ENORMOUS horseflies (ignore them or soon you’ll be thrashing about, increasing your body temp even more)

– the pain (deep squats or bending over happens approximately every 15 seconds. If you haven’t worked out in a few months/years/decades, you start daydreaming about laying in savasana.) 

– dropping a berry that is PERFECT (do NOT search for it… omg such a rookie move) 

– knocking over your entire basket (this can lead to weeping so don’t be stupid and set your basket on a rock … always wedge it in somewhere)

– hearing rustling in the bushes (a bear? a snake?) – do not use your imagination – consider the creature to be your competition and pick on

Throughout the berry picking there is often lively banter from patch to patch. Don’t be distracted from the fact that people are in a masterfully discreet competition. Best patch, most berries. Period. You have to FOCUS.

And for Christ’s sake, don’t step on the berries! (Crucial part of the code – almost forgot to tell you this…)

Once you think that you have suffered picked enough, it’s time to see if the others are feeling the same way WITHOUT ASKING THEM OUTRIGHT. Part of the code is that you don’t complain and you can’t be the one who has had enough. So this is a careful move. Pick your way back to the boat. If you’re with an elder, one of them will likely be there already. But if you’re with folks in your generation, you want to navigate this next step fairly carefully. Of course, you also need to have more berries than them, so keep that in mind. If you’ve got more, then just go for a skinny dip or check your phone (to make sure the kids are ok). Someone will eventually suggest it’s time to go. If there’s thunder, that’s a perfectly legitimate reason to leave. Anything other than that and you’re a wuss. If you haven’t got more, you might want to double back and top up your basket. Depends on what you’re made of. 

Once you’re in the boat people invariably congratulate the best picker on their prowess (while secretly noting that they also have more leaves, red berries and stems in their basket).

Berries in the boat
Bottom of the boat comparison. Note the extra foliage in Paul’s basket. Demerit points. Just sayin’

And you leave.

Done picking
After a skinny dip we’re cool and ready to head back.

Go back to the cottage, take note of the location – maybe even mark it on the lake map so that you remember for next year – and start “cleaning” the berries for eating, baking or the freezer. 

Cleaning berries
When cleaning berries you have to pull out all of the purple & green berries, sticks, and leaves.
Garbage berries
This is the garbage that you have to pick out. It’s a total drag, actually.


And now you Bake Bake Bake! Here is one of my favorite things to bake with blueberries:  blueberry crumb cake (with a shit ton of berries in it).

Pretty much the best blueberry cake I’ve had.

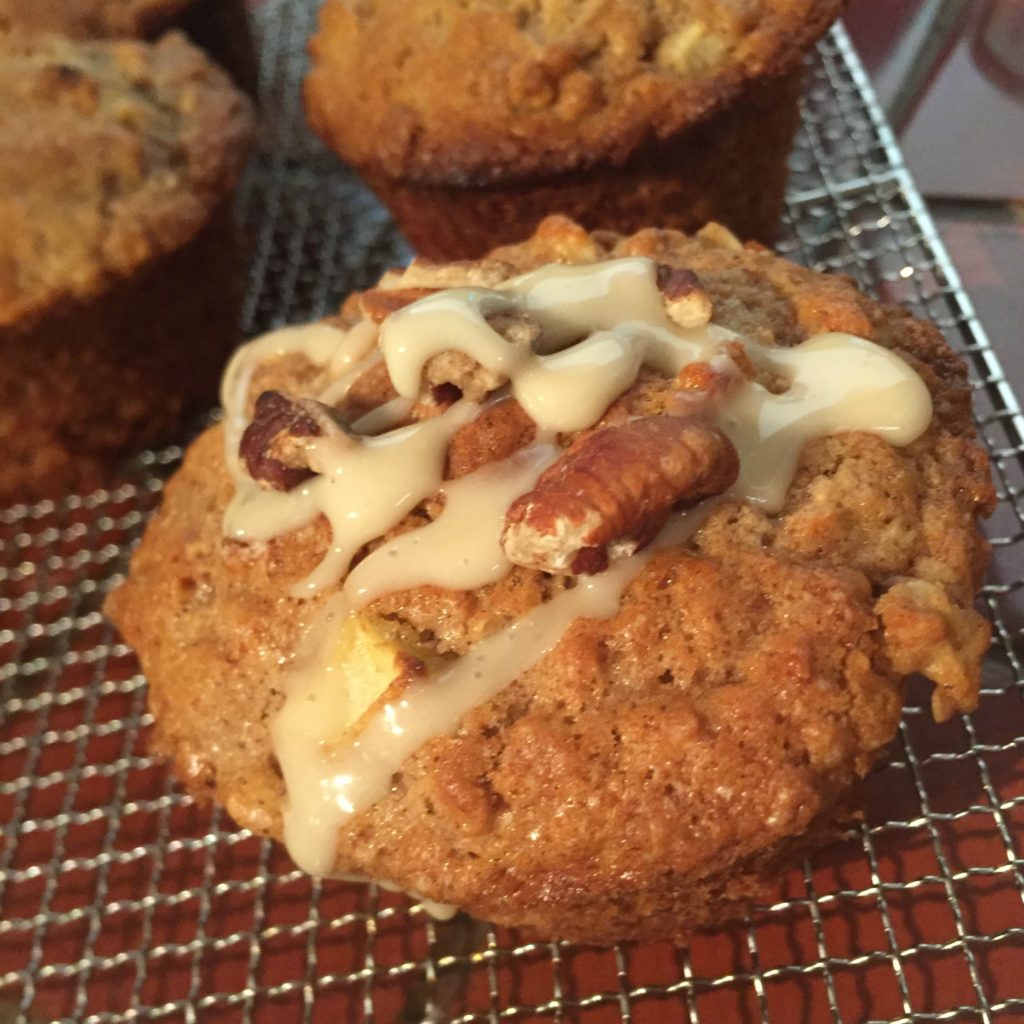
I have also made a LOT of blueberry muffins (see a previous post). They are the same flavor as the crumb cake – just not as many berries or as much sugar. 

Blueberry muffins
These are pretty much the perfect recipe. Check out the link to my older blog post for details.

My most recent discovery is bluberry boy bait (buttery and seriously amazing). At the time it was too amazing to take a photo of. Try it out!

Note that ALL of these recipes are from my fav blog, the smittenkitchen.

maple muffin

All Things Maple Syrup

During maple syrup season (aka spring) there are always dribs and drabs of syrup sitting around that I need to use up … bits that are leftover after bottling since it never works out evenly. And so I make stuff with it. And no one complains. Currently there are 4 partially filled jars of syrup on my window sill that I need to use up. It’s a horrible problem to have, isn’t it? 

In this post I will share FIVE of my favourite recipes for using up maple syrup. (There are more, but I’m limiting myself today.)

Top usage, of course, is as syrup. DUH. Around here we pour it on pancakes, waffles and french toast – but we don’t leave any on the plate. That kind of waste of the golden elixir is strictly prohibited. My dad used to always pour it on vanilla ice cream and bananas, but none of my kids have found that to be particularly appetizing. They do love weekend breakfasts that involve maple syrup… with pancakes, waffles, or french toast.  Any of those will do. They’re all quick and easy, and adding a bit of fruit makes me feel like I’m not a bad mother. 

pancakes
hydrotherm
french toast

(I threw a hydrotherm photo in there for you scientific sorts.)

Here’s the pancake recipe – it’s so quick and easy. You may just never use a boxed mix again. We shall see. 

Basic Pancakes
A simple, fluffy and quick pancake recipe. Great for weekend breakfasts.
Write a review
Print
Ingredients
  1. 1 cup all purpose flour (a little less if unsifted)
  2. 2 tsp. baking powder
  3. 1/2 tsp. salt
  4. 2 tsp sugar
  5. 1 egg
  6. 1 cup milk, soured
  7. 3 Tbsp. melted butter (you can use margarine or shortening, but why?)
Instructions
  1. Mix dry ingredients together.
  2. Beat eggs. Add milk and melted butter.
  3. Add wet to dry. Mix. Add more milk if you are making waffles.
  4. Let sit a bit, then make your pancakes as you do!
Making it Work https://pioneerintrees.com/
I’ve already written about Deborah’s famous granola … it’s truly amazing. If you haven’t made it yet, I HIGHLY recommend it.  It’s the kind of recipe that you make and put in a cool little jar and then take to someone’s house when you’re visiting and then they love you even more.

granola
Truly the most delicious granola EVER!

And I showed you the brilliant maple bars a while back. They keep well for a few days and impress the hell out of anyone who shows up at the door for a cuppa. 

maple bars
These maple bars are so freaking good – but they will stick to the pan and ruin your day. Use parchment.


This year Dave at Squirrel Creek Farm Services (best place to get all of your maple syrup supplies) gave us a new ‘all things maple’ cookbook and there’s a pretty lovely muffin recipe in there. I figured it was just perfect this week for Wendy. The first time I made them they were a bit ‘meh’ … they seemed a bit dry. I definitely made them too small. I was more careful with baking time, added better apple (granny smith this time) and watched my mixing technique just in case that was the culprit. Waddayaknow, they turned out pretty freaking AWESOME! (You really should make them. Who doesn’t have maple syrup and an apple laying around?) 

maple muffins
A little drizzle on top with some toasted pecan pieces? BAM. So good!


Maple Drizzled Apple Muffins
A tasty maple flavoured muffin that is also gorgeous to look at!
Write a review
Print
Ingredients
  1. 1 1/3 cups all purpose flour
  2. 1 cup rolled oats
  3. 1/2 cup white sugar
  4. 1 Tbsp baking powder
  5. 1 1/2 tsp cinnamon
  6. 1/2 cup milk
  7. 1/3 cup butter, melted
  8. 1/4 cup maple syrup
  9. 2 egg whiles, lightly beaten
  10. 1 cup chopped apple (granny smith are awesome)
  11. pecan halves or pieces for the top
  12. Glaze
  13. 3 Tbsp icing sugar
  14. 1 Tbsp maple syrup
Instructions
  1. Preheat oven to 400ºF. Prep your muffin tins (butter, spray or line with paper cups).
  2. Combine first 5 ingredients in a large mixing bowl. Mix well.
  3. In a separate bowl combine milk, butter, maple syrup and egg whites.
  4. Pour the wet into the dry ingredients and toss the apple bits in there too.
  5. Stir only until moistened. DO NOT overmix. Thank you.
  6. Fill to top of muffin cups - you'll have about 9 big muffins.
  7. Bake for 18-20 minutes.
Glaze
  1. Blend together the sugar and maple syrup. Drizzle over the muffins when they are cool. Toss a couple of pecans on there and drizzle again for good luck.
Making it Work https://pioneerintrees.com/
One more recipe that I MUST share with you that I found it in a newspaper years ago is a frozen mousse. You really need to make it in the morning if your’e serving it at night, since it needs to FREEZE UP. (I often forget that part.) All you need are: maple syrup, whipping cream, eggs. Ta da! (ok, it’s a bit fussy, I’ll admit… but it’s worth it) 

maple mousse constructing
maple mousse done
plated maple mousse

I love to serve it with a ginger pound cake. It’s a great combo. I’ll do a post about that another time … 

Maple Syrup Mousse
A light and delicious frozen maple dessert.
Write a review
Print
Ingredients
  1. 1/2 cup maple syrup
  2. 2 eggs
  3. 1 cup whipping cream
Instructions
  1. Heat the maple syrup until bubbly.
  2. Separate two eggs.
  3. Put the egg yolks in the top of a double boiler and whisk thoroughly.
  4. Add hot syrup. Whisk until it thickens to coat the back of a wooden spoon.
  5. Cool.
  6. Beat egg whites until stiff.
  7. Whip cream until firm.
  8. Combine all three and mix.
  9. Put in a dish and freeze.
  10. Take the mousse out of the freezer and put it into the fridge one hour before serving.
Notes
  1. This is a good recipe to make the day ahead!
Making it Work https://pioneerintrees.com/
mini muffin

Wendy Week 3 – Get Things Moving with Bran Muffins!

I have made this bran muffin recipe for decades – it’s straight from the side of a Quaker wheat bran box. I copied it down decades ago – I have no idea if Quaker still has the recipe on the side now … I buy my bran from the bulk food store now because I’m cheap. 

I’ve tried other bran muffin recipes, and none seem to be as good as this one. It’s easy for bran muffins to be dry and boring – these ones are neither. Nice hit of molasses, the sweetness with brown sugar and a load of milk make them somehow perfect. I usually make them for the kids with chocolate chips, but I prefer them with dates. To satisfy both, I often double the recipe, split the batter, and make the kids a pile of mini muffins with chocolate, while my large muffins have dates. I’ve tried splitting the batter and putting half in with dates and half in with chocolate, but I’m telling you, it’s bloody impossible to tell a date from a chocolate chip just by looking at a baked muffin. 

This muffin recipe differs from all of my others in that it uses shortening. That’s a bit odd, no? But it works. Cream your shortening and sugars – brown sugar and molasses – as you would for cookies. Again, … wierd. Why not melt it? Well. Don’t. Ok? Listen to me. 

Note: It’s really important that you do this creaming step well, since you have to add your eggs and milk to this … and once you’ve added those liquids, if you haven’t incorporated the shortening well, you’ll have and uneven crumb in your muffin. And that is pretty gross. Check out my handy 4 step visual guide for combining the first five ingredients. Can you figure them out?? 

adding the egg
add milk
mixed in egg
done the wet

You’ll have quite the runny mess by now…  

Add dry ingredients and mix till just combined. This is the point that I divide my batter and add the chips and dates to different bowls. Easy peasy. 

dry ingredients
chocolate chips

Bake ’em up at 400 – keep an eye on them. As soon as there is no softness in the peak, pull them out. The wee ones are done in a jiffy!

big and small
These large ones have dates, while the wee ones have chocolate chips. Delish!

Oh ya… the ACTUAL recipe from the green bran box of yore … 

recipe
The things people post online…
finished muffins

Wendy Muffins Week 2 – Blueberry!

For Wendy’s 2nd week of recovery I decided to make blueberry muffins that have a perfect amount of lemon zest in them. The recipe is one I got from smitten kitchen – I follow their Instagram account and love pretty much everything that they reveal to the world. This recipe was adapted from Cooks Illustrated, and I love them too, as I mentioned in a previous post

I love this recipe because it’s dead easy, flavourful, has a nice crunchy top (thanks demerra sugar), and the blueberries – even the massive farmed ones – stay distributed through the the muffin. It’s pretty much the perfect recipe. 

As with most other muffin recipes, you mix the fat / sugar / egg / dairy / flavouring together in one bowl, and the dry ingrediants in a separate bowl. Some recipes have you make a “well” in the dry ingredients and then add the liquid to that … blah blah blah. It doesn’t matter!! Just keep the wet and dry apart and then mix them up all at once … no gradual adding of ingredients. The key to muffins is that you don’t want to over mix. If you do, you’ll get little cement pucks. 

ingredients
Three bowls. Wet ingredients, dry ingredients and blueberries with a bit of flour. Simple.

The overmixing factor cannot be igored. As SOON as the flour is incorporated you must STOP. See here? 

ready to mix
Coating the blueberries with a bit of flour will help prevent them from “bleeding”. But you know this.
mixed
Done the mix. Not too much blue in the batter…

Rather than a wooden spoon, I use a really cool gadget from Lee Valley called a Danish Dough Whisk. (Of course it’s European, as many cool cooking accessories are.)

As I mentioned above, it’s recommended that you top the batter off with a sprinkle of that chunky demerra sugar. It’s worth a trip to the store if you don’t have any! 

uncooked
The batter is stiff going in to the pan – but it’s fine. Sprinkle the sugar randomly on top.
muffins done
Done! 
plated muffin
Enjoy with a wee spot of butter. (Makes everything better, don’t ya know?)
muffins

6 Weeks of Wendy Muffins

One of my BFFs, Wendy, just had surgery. I’ve committed to making her family a batch of muffins every week for 6 weeks. It’s a muffin pledge.

Week 1: banana oat muffins with chocolate chips. A family fav.

Sometimes you have too many bananas laying around because they’ve gone a bit too brown and they are rejected… sometimes you buy too many bananas ON PURPOSE. 

bananas
These ones were $1.15 in the dinted produce section of my grocery store. (How great is that??)

My “go to” methods for reducing the number of bananas in my house is to freeze them (peel, slice, baggie). My methods for actually using them up are generally: smoothies, banana muffins and banana bread (in that order). 

This muffin recipe is FANTASTIC. First of all, because it calls for 5  or 6 medium bananas. It’s a blessing. Amen. So many other banana muffin recipes use up 2 bananas. That’s just bonkers. Why go to all that trouble for just 2 bananas?

This recipe is also FANTASTIC because the muffins are DELICIOUS. They are moist and have a great ‘crumb’. It’s a totally standard recipe – no special ingredients other than maybe oatmeal, which is pretty standard in my opinion. The oats give it some body, which differentiates the muffin from a banana bread. (Why bother making banana bread in muffin form? Just make the bread already!)

ingredients
You’ve gotta love a basic recipe.

In all my years of baking muffins, I’ve learned that the things you toss in at the end are often most important part of the muffin. Raisins and other dried fruit can really piss kids off, while chocolate chips are not fully enjoyed by many adults. Toasted nuts are good for all, I find. Sometimes I split the batter and try to please everyone. But not usually. I generally make whatever the hell I want.

This recipe (in its infancy) actually called for cranberries – dried or otherwise. I’ve put them in once (ok, they were actually dried cherries). People at work ate them happily enough, but they’re basically always starving and desperate. So there were no further iterations with dried cranberries cherries. 

This batch has a couple of handfuls of chocolate chips. For maximum enjoyment.

muffins
Look at those melty chocolate chips! So yummy.

Try this recipe. It’s fantastic!! 

breakfast
Wendy had a great start to the day – drugs and muffin and tea. Perfecto.
Banana Oat Muffins
Uses lots of bananas, is moist and EASY!
Write a review
Print
Ingredients
  1. 1 1/4 c all purpose flour
  2. 1 1/4 c quick oats
  3. 2/3 c granulated sugar
  4. 1 1/2 tsp baking powder
  5. 1 tsp baking soda
  6. 1/4 - 1/2 tsp salt depending on your taste
  7. 1 egg
  8. 2 cups mashed bananas (5 or 6)
  9. 1/3 cup butter or margarine, melted, hurray!
  10. 1 cup of anything you like (nuts, chocolate, dried fruit)
Instructions
  1. Combine first 6 ingredients in a large bowl.
  2. Mix well.
  3. In another bowl beat egg, banana and melted butter until smooth.
  4. Add to dry ingredients and stir to blend.
  5. Stir in cranberries just to mix.
  6. Fill greased muffin tins till almost full.
  7. Bake at 375˚ for approximately 20 minutes.
Notes
  1. Sprinkle a few large flakes oats on the top for a pro finish.
Making it Work https://pioneerintrees.com/

Got Lemons? Make this Lemon Bread!

When I was a kid I was very much aware of moms and aunts and grandmas who liked to bake. Why? Because my mom’s specialty was jello with fruit floating in it (and incidentally, we loved it). At some point my aunt Liz impressed me with this iced lemon bread. I dutifully wrote it down and it still stands as my favourite way to use up a couple of lemons.

lemons
These smallish Meyer lemons are so lovely! 

I don’t know if it’s because of the shortening, but this sweet bread is very light and moist. That being said, if I’m low on shortening I combine what I have with butter and that seems to work out too. So forget what I said about the shortening being the reason. Maybe it was a lot cheaper to use shortening back in the day so that’s why it’s there. I have no idea about shortening. What IS it, anyway? 

The selling point of this bread it the lemon juice / sugar combo that you pour over the top while it’s hot. The bread soaks it up and when it’s cool it’s a bit sticky, but SUPER tangy. It’s awesome. And maybe that’s why is light and moist. Yep. That’s why.  

lemon bread
Note the invisible glaze. I LOVE hidden sugar. Nirvana. 


Iced Lemon Bread
Yields 1
A light sweet bread with a tart lemon glaze.
Write a review
Print
Prep Time
20 min
Total Time
50 min
Prep Time
20 min
Total Time
50 min
Ingredients
  1. 1/2 cup shortening
  2. 1 cup white sugar
  3. 2 eggs
  4. rind of 1 large lemon or 2 small lemons
  5. 1/2 cup milk
  6. 1 1/2 cups all purpose or bread flour
  7. 1 tsp. baking powder
  8. pinch of salt
  9. optional: poppy seeds
Glaze
  1. 1/4 cup white sugar
  2. juice of 1 large or 2 small lemons
Instructions
  1. Grease your loaf pan and place a piece of parchment on the bottom. This loaf will stick to the bottom because of the glaze.
  2. In a large bowl, cream the shortening and sugar together until light. Add eggs one at a time. In a small bowl, whisk together flour, baking powder, salt and rind. Add alternately to the creamed mixture with the milk (flour/milk/flour/milk/flour).
  3. Pour batter into the loaf pan and smooth the top. Bake at 350º until done.
  4. Mix together the sugar and lemon juice. Slowly pour over the hot bread. Let the loaf cool for at least 10 minutes - then take out of the pan to cool completely.
Notes
  1. This recipe will make 3 nice sized mini loaves (If you have one of those mini loaf pans that makes 4 lovely loaves).
Making it Work https://pioneerintrees.com/
large cupcake

Why Not Carrot Cupcakes?

Ever been at a meeting and had those oily and predictable muffins offered as a snack? Ever wished it was cake? I have. Sadly, no slices of cake are offered up at meetings that I go to … so the other day I decided to make cupcakes for my table group. They LOOK like muffins. They have veggies. Everyone’s happy. 

Generally I decide what I’m baking for a meeting in the morning … and this is not always a good thing, since I don’t have a lot of time. I had seen some kickin’ carrot cupcakes on Insta a while back and of course I didn’t bookmark them – who does that? – so I took a quick look online for a simple carrot cake cupcake that can be made in less than an hour. I found a promising one on the Food and Wine Network website. (And with lots of stars! Very important.) Extra bonus, I loved the title: Take 5 Carrot Cupcakes. I got busy.  

ingredients
beating

Ya Ya … lots more happened, but who has time to take photos when you still have to get ready for work? So … yada yada yada … and then time to make my favourite cream cheese icing recipe. The honey, lemon juice and zest combo make it SPECTACULAR. Really you must make this. 

icing recipe
I think that this is from the LCBO Food & Drink magazine. I recognize the font. (Interesting coincidence that both of these recipes are associated with alcohol.)

Of course any good icing requires a bit of sugar.

icing sugar
I enjoy sifting. And I LOVE parchment paper. It’s my kitchen bff.

 In no time at all you’ve got a decent table snack. 

carrot cupcakes
Normally I’d put a few candied pecans on the top or some extra lime zest, but I was in a hurry …

Since I doubled the recipe (so I’d be sure I’d have enough), I was able to bake up a few extras for the fam me. So glad. 

large cupcake
I often use ramekins when I have extra batter. Very handy indeed.


bottles

Maple Syrup Time Again

Even though day 1 of spring is officially tomorrow, we had a prelude to a spring a couple of weeks ago and as a consequence we have already made 101 litres of maple syrup. I know. That’s a lot of pancakes. But apparently we need more, so I’m heading out shortly to check the lines and collect sap. Before I do that though, I’ll give you a bit of an overview of the operation – purely hobby, by the way, so some of my methods / tools may be a bit questionable to a pro. (And if you work for the CFIA, stop reading this now, because I only sell syrup to friends and family. Thanks very much. Goodbye.)

We (ok, my brother) tapped in mid February this year. It’s a bit of a risky move, because your tapped holes can dry up if there is a long freeze in between runs. We He went for it. He’d collect and boil in the day, I’d come home from work and finish the boil. We’d try to do finishes together, but it didn’t always work out. (Of course, in the March break, when I had LOTS of time to boil and finish, it didn’t run.)

Let me take you through the process with the help of some photos I’ve taken over the years. 

When we’re ready to tap the lines they are already hanging from the trees since we leave them up year round. There is usually some damage to the lines – the deer sometimes like a nibble – so fixing the lines is often necessary. 

tap and fix
We generally fix and tap at the same time, working our way up the line. Hot water, extra tubing and taps are necessary, as is the handy and very sharp knife. 

Tapping takes a day or two – we tap about 300 trees … and several trees have more than one tap. Most taps are connected to tubing (various colours). We do have 20 or so buckets that we use around the house where I don’t want to hang tubing. I can also ask visitors to collect sap from the buckets. It keeps them happy. 

drilling
You need to drill on a slight upward angle. Tony’s a pro.
tapping
Vintage photo of Liam putting the tap into the freshly drilled hole. Afterwards it is hammered in. 
spile
The spile has a wee trough, a hook and a hole for the lid pin to go through. Clever.
After you hang the bucket on the spile you have to attach the lid with a long metal pin. It’s a bit tricky.
drip
Once the tree has been tapped and the spile hammered in, the sap runs immediately.

The tubing runs downhill and into jerry cans that collect the sap. These were a brilliant choice by my dad as the tubing fits perfectly into the vent hole.

saplines
We stretch the lines starting at the bottom of the line, tapping as we go, and raising the line up the trees so that the sap can run easily down the line and into the container.

We collect the sap by exchanging the full cans with empty ones. They conveniently fit in the back of the gator. Clever, eh? 

gator
Cousin Tim jets around to collect. There’s a job for everyone!
night
If the temperature stays warm the sap will run at night. So we collect at night. The coyotes can freak you out a bit…

The sap is then transferred into big stainless steel containers. We have about 400 gallons of storage space. 

sap
The sap is poured through the first of many filters.

Once we have enough sap to boil, we light up the fire in the sugar shack and feed the sap down through handy pipes. 

shack
You can see the pipes go into the shack right under the obligatory OMSPA sign.

The procedure in the sugar shack is pretty basic. Boil the hell out of the sap until all that’s left is syrup, then filter it and bottle it. The machinery is pretty spectacular though! 

pans
These lovely pans make incredible syrup. They’re made in Quebec by the pros.

The slow work is feeding the fire, skimming the foam, checking the levels and collecting more sap. As it boils down we pull small batches into the finishing pan which sits beside the evaporator pans. Once we have enough to finish (around 26 litres), we light up the propane under finishing pan and prepare to do a “finish”. 

skimming
As the sap boils in the upper evaporator pan, we skim off any foam that builds up.
fire
Keeping the boil high is important. We have varying theories on the best way to achieve this. I am right of course.
filter
Once the syrup sap reaches a certain temperature in the lower evaporator pans we pull it off, filtering it as we do so into the finishing pan. This is the second filtering. It’s critical. See the sediment?

This final part is the art of it all. The syrup is boiled in the finishing pan until a certain temperature is reached. This stage of the work involves beautiful caramel bubbles, measuring the Brix (sugar content) with the hydrotherm and taking it off at just the right time. The syrup is poured through its final set of filters as it goes into the bottling pan. 

caramel
final filter
done
hydrotherm

If you boil the syrup too long and the sugar content is just too high, the syrup will crystallize. Even though it’s pretty and can be used to teach Grade 4 kids in their rocks & minerals unit, it’s a waste of syrup and very disheartening. I’ve become better at finishing now, so I haven’t had crystals in a few years. 

These are my sample bottles that sit in the window. One sample for each finish. The crystals formed within a month.

Making maple syrup is a LONG process. Fun fact: it takes 40 litres of sap to make 1 litre of maple syrup. That’s why it’s a labour of love, and why I’ll smack you if I ever see you leaving maple syrup on your plate. 

Another Giada Recipe – Chicken Saltimbocca

Once you have cracked the cover of one of Giada de Laurentis’s cookbooks, you won’t be able to make JUST ONE recipe. Nope. Right now my cookbook has 3 scraps of paper sticking out of it … and it doesn’t go back on the shelf till I’ve made each one. (Soft rule… gets broken… whatever.) 

So when I was making the Simple Bolognese sauce last week, I considered making something NEW from the cookbook. EGADS! A NEW RECIPE?? … AND ON A WEEKNIGHT! (Yes, I confess, I generally make tried and true recipes during the weekdays since I have less time. I’m no Dana K.) But this one seemed pretty quick. So I bought the ingredients on the weekend and while the Thai Squash soup was simmering, I whipped it up. Just like that. BOOM!

CHICKEN SALTIMBOCCA.

Doesn’t that sound impressive? Well, yes, dammit, it IS. Very very impressive.

smashed chicken pieces
proscuitto
first attempt

AND it’s actually dead easy to make … flatten the chicken (I think I applied a bit too much force), lay a piece of prosciutto on it, top that with spinach, and roll up. Well ok, it’s not THAT easy. You have to defrost the spinach, season it and add some olive oil. You also have to grate some parmesean and lay THAT on top of the spinach. WHICH. I. FORGOT. So I had to unroll all of my beautiful rolls. Very funny. Ha Ha.

Last part is dead easy too. Sear in a pan till brown on all sides. 

cooking da chicken
2 min. each side. Ok, this was sticking a lot and it got a LOT messy in there … next time, more oil…

Finally, you add chicken broth and a squirt or so of lemon juice and simmer till it’s cooked. Take the chicken out, thicken up the sauce and serve! 

final chicken
MY VERSION. I don’t think the green bits are not supposed to show. Nor the prosciutto. Whatever. 

Despite it looking like it was made by a 5 year old, it was AMAZINGLY good. And impressive anyway. Shut up Dana K. 

Giada's chicken
That’s me holding open the cookbook.  Nice chicken, Giada.

(You’ll notice that Giada’s version is not BURSTING. Isn’t it tidy and perfect? Ah yes. And so it goes.)

You can find the recipe for Chicken Saltimbocca here.

spaghetti!

Best Ever and Dead Easy Bolognese Sauce

You know when you’re driving home from work and you suddenly think – Oh shit! What are we having for dinner? Ya, well that never happens to me. lmao

I’m going to present you with a tried and true, dead easy pasta sauce. I learned it from one of my all time favourite TV cooks, Giada de Laurentis. I met her back in the day when I used to watch the Cooking Channel as I burned calories on the treadmill. It was the only way I could get through it. (I think that’s irony… yes?) Anyhow, Giada introduced me to easy Italian recipes, and taught me a TON of cooking tips in the process. I use her her first cookbook, Everyday Italian, regularly. It was given to me in 2005! Now that’s almost vintage. 

giada cookbook
An oldie but a goodie.

What I like about this sauce is that you can put it together with very basic ingredients and it’s FAST. … although making it without fresh basil kinda sucks, so you will want to have a little forethought and pick up a bunch of the fresh stuff. Oh and you must have some pecorino romano or at least parmigiano reggiano. 

handful of basil
Nice photobomb, Annie!

Oh and one more MUST … a can of crushed tomatoes. I always keep cans of crushed tomatoes in my pantry, SPECIFICALLY for this recipe. It simply is not the same with any other kind of tomato product – whole, crushed, sauce, etc… You NEED to have a can of crushed tomatoes. It creates the perfect consistency without any need to fart around with simmering down a watery sauce or thickening with tomato paste. Who the hell has time for that? NO ONE. Ok, lots of people do. But not me.

When you grab all of the ingredients that you will have on hand now that I’ve told you, it will look kinda like this (plus a can of crushed tomatoes that I forgot to put in the picture): 

ingredients
Those are heritage carrots. The orange one was purple before I peeled it. Yes, they’re very fancy carrots…

And here’s my beef about beef. I’ve decided that I am no longer buying grocery store ground beef, because it’s just plain STINKY. When it cooks it lets off a fuggy dead cow smell … and my neighbour, a cattle raiser (or whatever the hell she’s called), told me that the smell is from the crap ass chemicals in the beef. Buy the good stuff and as it cooks all you’ve got is beautiful smelling chuck. AND SHE WAS RIGHT!! 

market
hamburger1

Let this sauce simmer for as long as it takes to cook your noodles and then it’s ready to eat. Nothing to it.

spaghetti!
Ta Da!

I could type out the recipe into my fancy widget, but Giada has the recipe on her website, and you’re gonna want to visit Giadzy! It’s a great site. 

Get the recipe here.