Author: pioneerintrees

Finished cake

Always a Good Day for a Lemon Chiffon Cake

Yesterday was my mom’s 83rd birthday … and today we celebrated! Since one of her favourite flavours is lemon, I decided to whip up a light and not too sweet lemon chiffon cake for her. I found the recipe years ago in an LCBO magazine. Could be wrong. Likely am. Chiffon cake in an LCBO magazine? But the font looks right. Check it out. Am I wrong? 

LCBO?
Is it bad when you can recognize an alcohol focused magazine from its font?

Moving on. 

I posted a few pics of the cake a year or so ago, but I didn’t really pay homage to the cake in that post (it was mostly about my neighbour’s horrible fire).  So here’s a wee bit more about the cake.

  1. It is not very sweet. Therefore, folks who don’t generally partake in dessert tend to love this cake. Namely, my foggy friend. Hates sugar, eats the cake. 
  2. There three ingredients which you may not have just laying around your house:
    • A shit ton of eggs. 7 in the chiffon cake, 7 in the lemon topping. Be prepared.
    • 3 lemons – for the rind and juice (oh, no, don’t use the bottled lemon juice. dear god). 
    • A nice big hunk of white chocolate – making large and attractive curls is the best part of this whole enterprise. (Unless you’re like me and forget and end up using a little piece of white chocolate from the bulk food store…)
  3. There’s a lot of folding. And folding is not the same as stirring. Seriously. You must fold. There’s a technique. 
  4. The topping takes a lot of time. It has to cook and cool completely before folding in the whipping cream. Be warned. 

It’s dead easy to make the cake part. Prep a 9 or 10″ springform pan. Then prep 3 bowls worth of stuff: the dry, the eggy mixture, the egg whites. Done. A bit of stirring and whipping and folding and Bob’s your uncle. (I know, he is.)
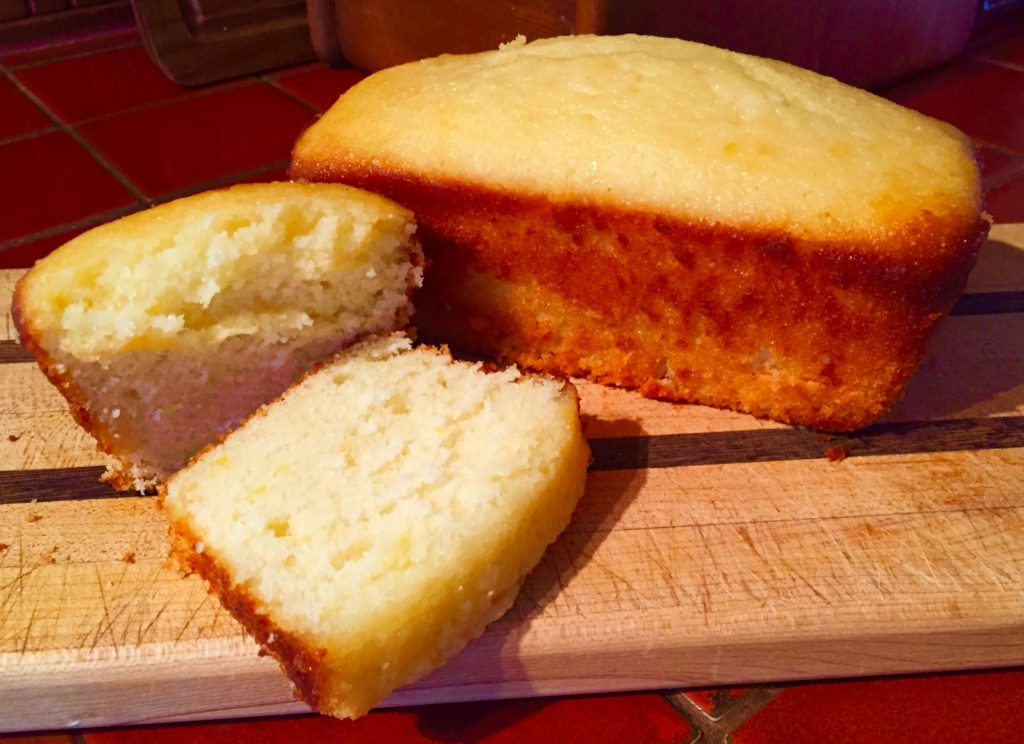
Basic ingredients:

Ingredients for Cake
Normal stuff. And note the CANADIAN flour. Love that!!

Comes out like this: 

Lemon Chiffon Cake
Not that impressive, right now, I know. 

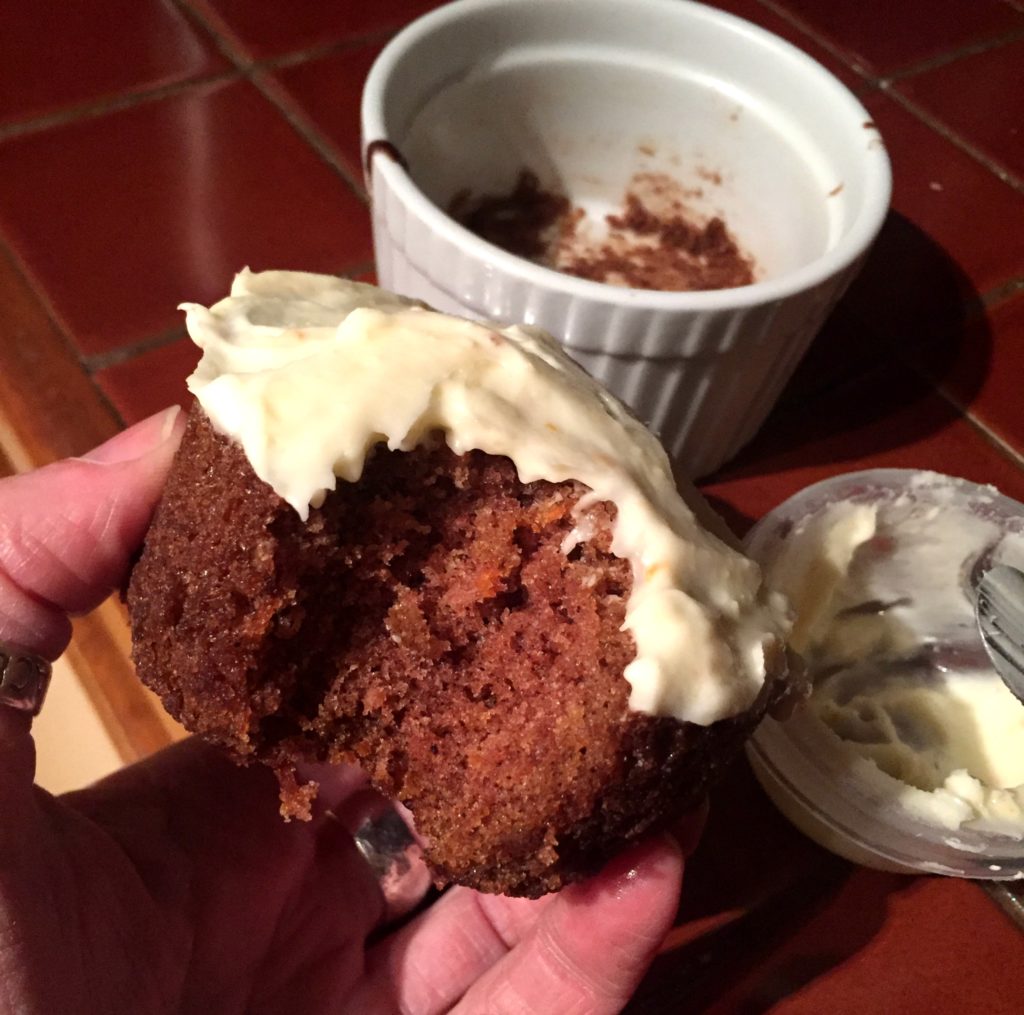
It’s also dead easy to make the topping … you just cook it all on the stovetop. (Maybe plan to clean out your fridge while it cooks for the 15 minutes. It’s a really long time when you’re not otherwise engaged in a task.) 

Once cooled, do the folding. Look at this technique… 

Folding
Up and over, rotate bowl. Up and over, rotate bowl.

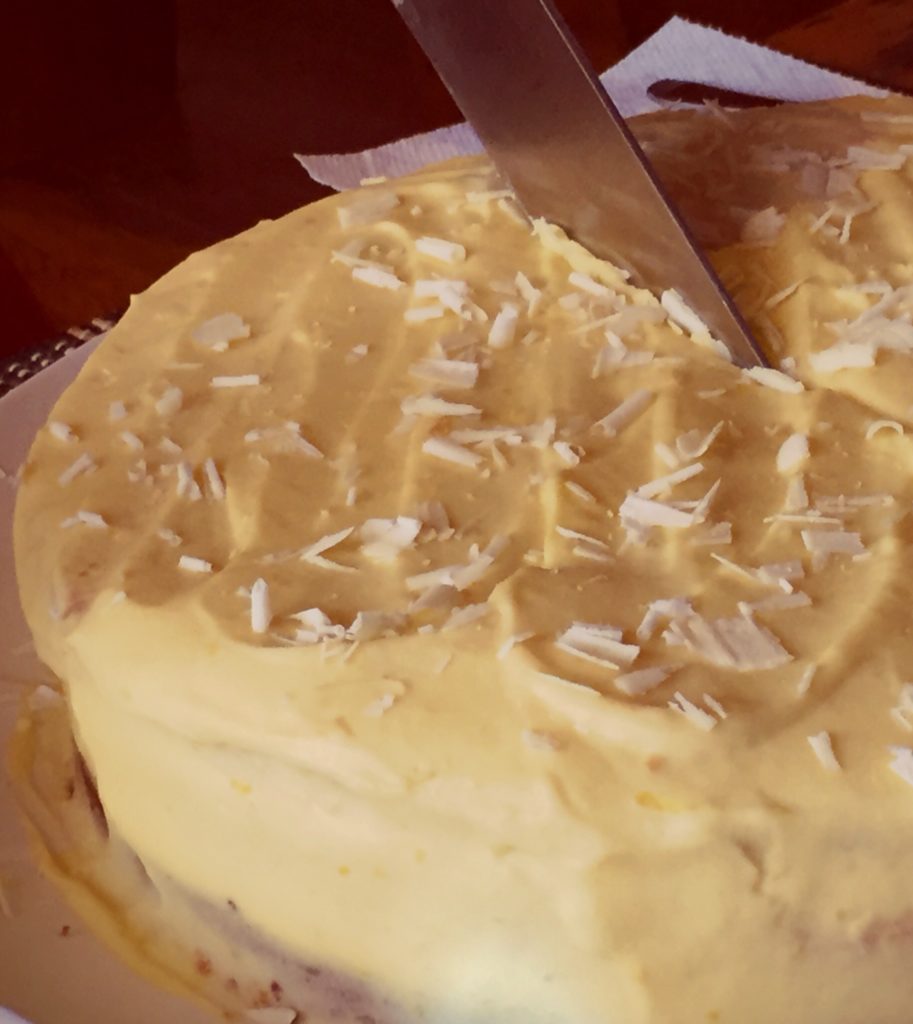
Put the layers together … and then the curls.

The cake
Light and moist. Lovely.

Enjoy! You’ll only have this much leftover. 

Leftover Chiffon Cake
YUM

Happy Birthday mom!

Birthday Girl
(Of course we forgot a candle for the cake…)


Lemon Chiffon Birthday Cake
Yields 12
A deliciously light and tangy cake!
Write a review
Print
Lemon Cake
  1. 2 cups flour
  2. 1 1/2 cups granulated sugar
  3. 1 Tbsp baking powder
  4. 1 tsp salt
  5. 7 eggs
  6. 1/2 cup water
  7. 1/4 cup lemon juice
  8. 1/2 cup canola oil
  9. 2 tsp grated lemon rind
  10. 1 tsp vanilla
  11. 1/2 tsp cream of tartar
Lemon Filling / Frosting
  1. 1 cup granulated sugar
  2. 1/2 cup unsalted butter
  3. 2 Tbsp grated lemon rind
  4. 1/4 cup lemon juice
  5. 7 eggs, well beaten
  6. 1/2 - 3/4 cup whipping cream
  7. 8 oz white chocolate
Instructions
  1. For the Cake: Butter and line 10" springform pan with parchment paper. Preheat oven to 325º.
  2. Sift together flour, 1 cup of the sugar, baking powder and salt in a large bowl.
  3. Separate eggs, placing yolks in a bowl and whites in a larger bowl. Whisk water, lemon juice, oil, grated lemon rind and vanilla into egg yolks.
  4. Stir wet ingredients into flour mixture.
  5. With an electric mixer, whisk egg whites until foamy. Beat in cream of tartar. Slowly whisk in remaining 1/2 cup of sugar and beat until stiff peaks form. Take a large spoonful of egg whites and stir into flour mixture. Fold in the remaining whites.
  6. Place batter in pan and bake for 50-60 minutes (until cake is golden brown, springs back when touched and a cake tester comes out clean). Cool in cake pan. Remove. Carefully cut into 3 layers with a serrated knife.
Lemon Filling / Frosting
  1. Mix sugar, butter, lemon rind, lemon juice and eggs in a heavy pot. Stir gently over low heat until mixture is thick and coats the back of the spoon, about 15 minutes. You should be able todraw a path across the bottom of the pan.
  2. Cool completely. Whip the whipping cream.
  3. Stir one large spoonful into the curd to soften the mixture (important!! No lumps here, people!). Fold the remaining whipping cream in.
  4. Spread a thin layer of lemon filling on each layer. Frost the top with more filling and smooth onto sides. Shave white chocolate all over top. Chill to harden lemon mixture.
Making it Work https://pioneerintrees.com/


Got stuff?

Too Much Stuff and The Lure of Minimalism

As September approaches my pulse quickens and the list-making ramps up about 50 notches. So much coming at me at lightening speed, so much stuff to get organized!! Kids: get stuff for school; work: get stuff organized at work and pick up the stuff you said you would but forgot until this week; extra-curriculars: register for hockey and choir and make sure you have all the right sized stuff (Jesus god, you need new skates again?? Wtf.); farm: consider how much wood we will need to get split (ok, that’s a separate post…).

OMG we need so much stuff and we already have too much stuff! And what does it do? It causes me stress!! 

Coincidentally (or maybe it’s a cosmic intervention), I listened to a podcast this morning by The Minimalists. Basically The Minimalists are two 30 something American men who are making a living preaching about how to live a simpler life with less stuff. They have a lot to say, they have a lot of adulating fans. It’s a bit rich at times, but … I can learn from them. I DO have too much stuff. I hold on to old papers, memorabilia, art supplies, a few of the kids’ baby clothes (ya, I am going to make them a quilt, ok?), wool that is so scratchy or ugly that I’ll never make anything from it, scrapbooking tools (I was good at it …stop judging), CDs (sooooo many), electronics cables (in case I ever need a yellow / white / blue combo thingy), hot tub chemicals that I will NEVER use (jet cleaner? Whaaa??), gardening tools (ya, that’s funny I know), candle nubs … you get the picture. I have WAY WAY too much stuff in my house, my garage, my office … likely in the cabin too, which is pretty damned small. I have stuff that I don’t use or apparently need, … everywhere.  

Egads

So I have decided to get a grip on things by taking the 30 day Minimalist challenge. On the first day of September I have until midnight to throw away, donate or sell ONE item. On the second day, 2 items. On the third day, 3. You get the picture. If you do the math (and there is an algorithm for that…), that’s a shit ton of stuff that will be out of my life by the end of September. I know it will just be the tip of the iceberg, but it’s a way to start thinking about it and perhaps even making better choices (like stop buying so much stuff, ummmm ya think?).

Logistically I don’t know if I can ACTUALLY sell a few items on the day that I plan to sell them … but I can post them for sale. And logistically I’m not driving to Vinnie’s every day I when I decide what to donate – but I can box them and label them and put them in the garage. 

Wanna join me?? Comment if you’re in!! 

To demonstrate my commitment to the crusade for “less is more”, I tossed an old, ripped, and completely ineffective pair of oven mitts into the flames today. BE GONE, I SAY!! You will never cause me to burn my hands again!

Burning Oven Mitts
They burn so beautifully! (Only thing they ever did well…)
Blueberries

Blueberry Picking as a Competitive Sport

This summer has been a banner year for blueberries – lots of blackflies in the Spring to pollinate, and lots of rain to help them grow. As a consequence I have been involved in several blueberry picking expeditions here at the lake. Each time I was out there I thought about blogging about it – it’s a fascinating activity, after all…

If you’ve never picked blueberries, read on. You might learn something about the sport art of blueberry picking. If you have, well, you’re not going to learn anything, but you might have flashbacks. Sorry. 

It all starts when you pick up the elders others who are going to join you. Choose carefully. You must like them a lot, and they must either know “the code” or be able to pick up on “the code” without being told directly. (Ok, from now on just do air quotes whenever I say “the code”.) If they don’t know the code, you’re in for a very irritating experience. The two elders in this photo taught me the code, so they’re cool. 

Elders
Liz & mom – experienced elders! 

Then you have to go to the secret location. If it’s not secret, you’d better hope you’re first, otherwise, you’re pooched. The best berries will be long gone. After a few days of berry picking season, once others have also started, you really need to start to investigate the crown land (don’t ever pick on someone’s property, even if they’re related … picking someone else’s berries is tantamount to theft and you will go straight to hell). If your fellow pickers are a bit more lithe (under 65 is good) you can have them hop out of the boat and do a quick looksee. This is what you want them to see:

Bushes
Blueberry bushes at the beginning of the season – we knew there was lots of good picking to come!

There needs to be a LOT of berries to make it worthwhile – or at least a reasonable amount of BIG berries – otherwise it’s not going to be a long berry picking session. 

Note: Leave your phone in the boat or you will be treated as a teenager, chastised for being tethered to your phone (and the temptation to take photos will slowly overpower your will to keep picking, let’s face it…). 

Once you’re out there picking, you’d better have a lot to think about, because it’s fucking boring as hell. It takes a LONG time to pick blueberries, even when they’re big. And if the boredom doesn’t get you, there are other things that will:

– the incessant chatter of the person close to you

– the fact that someone has come along and has started picking IN YOUR PATCH (this only happens with rookies) – when that happens, try not to lose your mind – just move on gracefully, you can be mature! 

Quart basket
Everyone has a favourite picking container. Quart baskets do nicely. But no handle …

– the insidious heat (berries like the sun, and since part of the code is to wear long pants & shirts, shoes and a hat, you’re going to be dying)

– the ENORMOUS horseflies (ignore them or soon you’ll be thrashing about, increasing your body temp even more)

– the pain (deep squats or bending over happens approximately every 15 seconds. If you haven’t worked out in a few months/years/decades, you start daydreaming about laying in savasana.) 

– dropping a berry that is PERFECT (do NOT search for it… omg such a rookie move) 

– knocking over your entire basket (this can lead to weeping so don’t be stupid and set your basket on a rock … always wedge it in somewhere)

– hearing rustling in the bushes (a bear? a snake?) – do not use your imagination – consider the creature to be your competition and pick on

Throughout the berry picking there is often lively banter from patch to patch. Don’t be distracted from the fact that people are in a masterfully discreet competition. Best patch, most berries. Period. You have to FOCUS.

And for Christ’s sake, don’t step on the berries! (Crucial part of the code – almost forgot to tell you this…)

Once you think that you have suffered picked enough, it’s time to see if the others are feeling the same way WITHOUT ASKING THEM OUTRIGHT. Part of the code is that you don’t complain and you can’t be the one who has had enough. So this is a careful move. Pick your way back to the boat. If you’re with an elder, one of them will likely be there already. But if you’re with folks in your generation, you want to navigate this next step fairly carefully. Of course, you also need to have more berries than them, so keep that in mind. If you’ve got more, then just go for a skinny dip or check your phone (to make sure the kids are ok). Someone will eventually suggest it’s time to go. If there’s thunder, that’s a perfectly legitimate reason to leave. Anything other than that and you’re a wuss. If you haven’t got more, you might want to double back and top up your basket. Depends on what you’re made of. 

Once you’re in the boat people invariably congratulate the best picker on their prowess (while secretly noting that they also have more leaves, red berries and stems in their basket).

Berries in the boat
Bottom of the boat comparison. Note the extra foliage in Paul’s basket. Demerit points. Just sayin’

And you leave.

Done picking
After a skinny dip we’re cool and ready to head back.

Go back to the cottage, take note of the location – maybe even mark it on the lake map so that you remember for next year – and start “cleaning” the berries for eating, baking or the freezer. 

Cleaning berries
When cleaning berries you have to pull out all of the purple & green berries, sticks, and leaves.
Garbage berries
This is the garbage that you have to pick out. It’s a total drag, actually.


And now you Bake Bake Bake! Here is one of my favorite things to bake with blueberries:  blueberry crumb cake (with a shit ton of berries in it).

Pretty much the best blueberry cake I’ve had.

I have also made a LOT of blueberry muffins (see a previous post). They are the same flavor as the crumb cake – just not as many berries or as much sugar. 

Blueberry muffins
These are pretty much the perfect recipe. Check out the link to my older blog post for details.

My most recent discovery is bluberry boy bait (buttery and seriously amazing). At the time it was too amazing to take a photo of. Try it out!

Note that ALL of these recipes are from my fav blog, the smittenkitchen.

maple muffin

All Things Maple Syrup

During maple syrup season (aka spring) there are always dribs and drabs of syrup sitting around that I need to use up … bits that are leftover after bottling since it never works out evenly. And so I make stuff with it. And no one complains. Currently there are 4 partially filled jars of syrup on my window sill that I need to use up. It’s a horrible problem to have, isn’t it? 

In this post I will share FIVE of my favourite recipes for using up maple syrup. (There are more, but I’m limiting myself today.)

Top usage, of course, is as syrup. DUH. Around here we pour it on pancakes, waffles and french toast – but we don’t leave any on the plate. That kind of waste of the golden elixir is strictly prohibited. My dad used to always pour it on vanilla ice cream and bananas, but none of my kids have found that to be particularly appetizing. They do love weekend breakfasts that involve maple syrup… with pancakes, waffles, or french toast.  Any of those will do. They’re all quick and easy, and adding a bit of fruit makes me feel like I’m not a bad mother. 

pancakes
hydrotherm
french toast

(I threw a hydrotherm photo in there for you scientific sorts.)

Here’s the pancake recipe – it’s so quick and easy. You may just never use a boxed mix again. We shall see. 

Basic Pancakes
A simple, fluffy and quick pancake recipe. Great for weekend breakfasts.
Write a review
Print
Ingredients
  1. 1 cup all purpose flour (a little less if unsifted)
  2. 2 tsp. baking powder
  3. 1/2 tsp. salt
  4. 2 tsp sugar
  5. 1 egg
  6. 1 cup milk, soured
  7. 3 Tbsp. melted butter (you can use margarine or shortening, but why?)
Instructions
  1. Mix dry ingredients together.
  2. Beat eggs. Add milk and melted butter.
  3. Add wet to dry. Mix. Add more milk if you are making waffles.
  4. Let sit a bit, then make your pancakes as you do!
Making it Work https://pioneerintrees.com/
I’ve already written about Deborah’s famous granola … it’s truly amazing. If you haven’t made it yet, I HIGHLY recommend it.  It’s the kind of recipe that you make and put in a cool little jar and then take to someone’s house when you’re visiting and then they love you even more.

granola
Truly the most delicious granola EVER!

And I showed you the brilliant maple bars a while back. They keep well for a few days and impress the hell out of anyone who shows up at the door for a cuppa. 

maple bars
These maple bars are so freaking good – but they will stick to the pan and ruin your day. Use parchment.


This year Dave at Squirrel Creek Farm Services (best place to get all of your maple syrup supplies) gave us a new ‘all things maple’ cookbook and there’s a pretty lovely muffin recipe in there. I figured it was just perfect this week for Wendy. The first time I made them they were a bit ‘meh’ … they seemed a bit dry. I definitely made them too small. I was more careful with baking time, added better apple (granny smith this time) and watched my mixing technique just in case that was the culprit. Waddayaknow, they turned out pretty freaking AWESOME! (You really should make them. Who doesn’t have maple syrup and an apple laying around?) 

maple muffins
A little drizzle on top with some toasted pecan pieces? BAM. So good!


Maple Drizzled Apple Muffins
A tasty maple flavoured muffin that is also gorgeous to look at!
Write a review
Print
Ingredients
  1. 1 1/3 cups all purpose flour
  2. 1 cup rolled oats
  3. 1/2 cup white sugar
  4. 1 Tbsp baking powder
  5. 1 1/2 tsp cinnamon
  6. 1/2 cup milk
  7. 1/3 cup butter, melted
  8. 1/4 cup maple syrup
  9. 2 egg whiles, lightly beaten
  10. 1 cup chopped apple (granny smith are awesome)
  11. pecan halves or pieces for the top
  12. Glaze
  13. 3 Tbsp icing sugar
  14. 1 Tbsp maple syrup
Instructions
  1. Preheat oven to 400ºF. Prep your muffin tins (butter, spray or line with paper cups).
  2. Combine first 5 ingredients in a large mixing bowl. Mix well.
  3. In a separate bowl combine milk, butter, maple syrup and egg whites.
  4. Pour the wet into the dry ingredients and toss the apple bits in there too.
  5. Stir only until moistened. DO NOT overmix. Thank you.
  6. Fill to top of muffin cups - you'll have about 9 big muffins.
  7. Bake for 18-20 minutes.
Glaze
  1. Blend together the sugar and maple syrup. Drizzle over the muffins when they are cool. Toss a couple of pecans on there and drizzle again for good luck.
Making it Work https://pioneerintrees.com/
One more recipe that I MUST share with you that I found it in a newspaper years ago is a frozen mousse. You really need to make it in the morning if your’e serving it at night, since it needs to FREEZE UP. (I often forget that part.) All you need are: maple syrup, whipping cream, eggs. Ta da! (ok, it’s a bit fussy, I’ll admit… but it’s worth it) 

maple mousse constructing
maple mousse done
plated maple mousse

I love to serve it with a ginger pound cake. It’s a great combo. I’ll do a post about that another time … 

Maple Syrup Mousse
A light and delicious frozen maple dessert.
Write a review
Print
Ingredients
  1. 1/2 cup maple syrup
  2. 2 eggs
  3. 1 cup whipping cream
Instructions
  1. Heat the maple syrup until bubbly.
  2. Separate two eggs.
  3. Put the egg yolks in the top of a double boiler and whisk thoroughly.
  4. Add hot syrup. Whisk until it thickens to coat the back of a wooden spoon.
  5. Cool.
  6. Beat egg whites until stiff.
  7. Whip cream until firm.
  8. Combine all three and mix.
  9. Put in a dish and freeze.
  10. Take the mousse out of the freezer and put it into the fridge one hour before serving.
Notes
  1. This is a good recipe to make the day ahead!
Making it Work https://pioneerintrees.com/
mini muffin

Wendy Week 3 – Get Things Moving with Bran Muffins!

I have made this bran muffin recipe for decades – it’s straight from the side of a Quaker wheat bran box. I copied it down decades ago – I have no idea if Quaker still has the recipe on the side now … I buy my bran from the bulk food store now because I’m cheap. 

I’ve tried other bran muffin recipes, and none seem to be as good as this one. It’s easy for bran muffins to be dry and boring – these ones are neither. Nice hit of molasses, the sweetness with brown sugar and a load of milk make them somehow perfect. I usually make them for the kids with chocolate chips, but I prefer them with dates. To satisfy both, I often double the recipe, split the batter, and make the kids a pile of mini muffins with chocolate, while my large muffins have dates. I’ve tried splitting the batter and putting half in with dates and half in with chocolate, but I’m telling you, it’s bloody impossible to tell a date from a chocolate chip just by looking at a baked muffin. 

This muffin recipe differs from all of my others in that it uses shortening. That’s a bit odd, no? But it works. Cream your shortening and sugars – brown sugar and molasses – as you would for cookies. Again, … wierd. Why not melt it? Well. Don’t. Ok? Listen to me. 

Note: It’s really important that you do this creaming step well, since you have to add your eggs and milk to this … and once you’ve added those liquids, if you haven’t incorporated the shortening well, you’ll have and uneven crumb in your muffin. And that is pretty gross. Check out my handy 4 step visual guide for combining the first five ingredients. Can you figure them out?? 

adding the egg
add milk
mixed in egg
done the wet

You’ll have quite the runny mess by now…  

Add dry ingredients and mix till just combined. This is the point that I divide my batter and add the chips and dates to different bowls. Easy peasy. 

dry ingredients
chocolate chips

Bake ’em up at 400 – keep an eye on them. As soon as there is no softness in the peak, pull them out. The wee ones are done in a jiffy!

big and small
These large ones have dates, while the wee ones have chocolate chips. Delish!

Oh ya… the ACTUAL recipe from the green bran box of yore … 

recipe
The things people post online…
finished muffins

Wendy Muffins Week 2 – Blueberry!

For Wendy’s 2nd week of recovery I decided to make blueberry muffins that have a perfect amount of lemon zest in them. The recipe is one I got from smitten kitchen – I follow their Instagram account and love pretty much everything that they reveal to the world. This recipe was adapted from Cooks Illustrated, and I love them too, as I mentioned in a previous post

I love this recipe because it’s dead easy, flavourful, has a nice crunchy top (thanks demerra sugar), and the blueberries – even the massive farmed ones – stay distributed through the the muffin. It’s pretty much the perfect recipe. 

As with most other muffin recipes, you mix the fat / sugar / egg / dairy / flavouring together in one bowl, and the dry ingrediants in a separate bowl. Some recipes have you make a “well” in the dry ingredients and then add the liquid to that … blah blah blah. It doesn’t matter!! Just keep the wet and dry apart and then mix them up all at once … no gradual adding of ingredients. The key to muffins is that you don’t want to over mix. If you do, you’ll get little cement pucks. 

ingredients
Three bowls. Wet ingredients, dry ingredients and blueberries with a bit of flour. Simple.

The overmixing factor cannot be igored. As SOON as the flour is incorporated you must STOP. See here? 

ready to mix
Coating the blueberries with a bit of flour will help prevent them from “bleeding”. But you know this.
mixed
Done the mix. Not too much blue in the batter…

Rather than a wooden spoon, I use a really cool gadget from Lee Valley called a Danish Dough Whisk. (Of course it’s European, as many cool cooking accessories are.)

As I mentioned above, it’s recommended that you top the batter off with a sprinkle of that chunky demerra sugar. It’s worth a trip to the store if you don’t have any! 

uncooked
The batter is stiff going in to the pan – but it’s fine. Sprinkle the sugar randomly on top.
muffins done
Done! 
plated muffin
Enjoy with a wee spot of butter. (Makes everything better, don’t ya know?)
muffins

6 Weeks of Wendy Muffins

One of my BFFs, Wendy, just had surgery. I’ve committed to making her family a batch of muffins every week for 6 weeks. It’s a muffin pledge.

Week 1: banana oat muffins with chocolate chips. A family fav.

Sometimes you have too many bananas laying around because they’ve gone a bit too brown and they are rejected… sometimes you buy too many bananas ON PURPOSE. 

bananas
These ones were $1.15 in the dinted produce section of my grocery store. (How great is that??)

My “go to” methods for reducing the number of bananas in my house is to freeze them (peel, slice, baggie). My methods for actually using them up are generally: smoothies, banana muffins and banana bread (in that order). 

This muffin recipe is FANTASTIC. First of all, because it calls for 5  or 6 medium bananas. It’s a blessing. Amen. So many other banana muffin recipes use up 2 bananas. That’s just bonkers. Why go to all that trouble for just 2 bananas?

This recipe is also FANTASTIC because the muffins are DELICIOUS. They are moist and have a great ‘crumb’. It’s a totally standard recipe – no special ingredients other than maybe oatmeal, which is pretty standard in my opinion. The oats give it some body, which differentiates the muffin from a banana bread. (Why bother making banana bread in muffin form? Just make the bread already!)

ingredients
You’ve gotta love a basic recipe.

In all my years of baking muffins, I’ve learned that the things you toss in at the end are often most important part of the muffin. Raisins and other dried fruit can really piss kids off, while chocolate chips are not fully enjoyed by many adults. Toasted nuts are good for all, I find. Sometimes I split the batter and try to please everyone. But not usually. I generally make whatever the hell I want.

This recipe (in its infancy) actually called for cranberries – dried or otherwise. I’ve put them in once (ok, they were actually dried cherries). People at work ate them happily enough, but they’re basically always starving and desperate. So there were no further iterations with dried cranberries cherries. 

This batch has a couple of handfuls of chocolate chips. For maximum enjoyment.

muffins
Look at those melty chocolate chips! So yummy.

Try this recipe. It’s fantastic!! 

breakfast
Wendy had a great start to the day – drugs and muffin and tea. Perfecto.
Banana Oat Muffins
Uses lots of bananas, is moist and EASY!
Write a review
Print
Ingredients
  1. 1 1/4 c all purpose flour
  2. 1 1/4 c quick oats
  3. 2/3 c granulated sugar
  4. 1 1/2 tsp baking powder
  5. 1 tsp baking soda
  6. 1/4 - 1/2 tsp salt depending on your taste
  7. 1 egg
  8. 2 cups mashed bananas (5 or 6)
  9. 1/3 cup butter or margarine, melted, hurray!
  10. 1 cup of anything you like (nuts, chocolate, dried fruit)
Instructions
  1. Combine first 6 ingredients in a large bowl.
  2. Mix well.
  3. In another bowl beat egg, banana and melted butter until smooth.
  4. Add to dry ingredients and stir to blend.
  5. Stir in cranberries just to mix.
  6. Fill greased muffin tins till almost full.
  7. Bake at 375˚ for approximately 20 minutes.
Notes
  1. Sprinkle a few large flakes oats on the top for a pro finish.
Making it Work https://pioneerintrees.com/

Got Lemons? Make this Lemon Bread!

When I was a kid I was very much aware of moms and aunts and grandmas who liked to bake. Why? Because my mom’s specialty was jello with fruit floating in it (and incidentally, we loved it). At some point my aunt Liz impressed me with this iced lemon bread. I dutifully wrote it down and it still stands as my favourite way to use up a couple of lemons.

lemons
These smallish Meyer lemons are so lovely! 

I don’t know if it’s because of the shortening, but this sweet bread is very light and moist. That being said, if I’m low on shortening I combine what I have with butter and that seems to work out too. So forget what I said about the shortening being the reason. Maybe it was a lot cheaper to use shortening back in the day so that’s why it’s there. I have no idea about shortening. What IS it, anyway? 

The selling point of this bread it the lemon juice / sugar combo that you pour over the top while it’s hot. The bread soaks it up and when it’s cool it’s a bit sticky, but SUPER tangy. It’s awesome. And maybe that’s why is light and moist. Yep. That’s why.  

lemon bread
Note the invisible glaze. I LOVE hidden sugar. Nirvana. 


Iced Lemon Bread
Yields 1
A light sweet bread with a tart lemon glaze.
Write a review
Print
Prep Time
20 min
Total Time
50 min
Prep Time
20 min
Total Time
50 min
Ingredients
  1. 1/2 cup shortening
  2. 1 cup white sugar
  3. 2 eggs
  4. rind of 1 large lemon or 2 small lemons
  5. 1/2 cup milk
  6. 1 1/2 cups all purpose or bread flour
  7. 1 tsp. baking powder
  8. pinch of salt
  9. optional: poppy seeds
Glaze
  1. 1/4 cup white sugar
  2. juice of 1 large or 2 small lemons
Instructions
  1. Grease your loaf pan and place a piece of parchment on the bottom. This loaf will stick to the bottom because of the glaze.
  2. In a large bowl, cream the shortening and sugar together until light. Add eggs one at a time. In a small bowl, whisk together flour, baking powder, salt and rind. Add alternately to the creamed mixture with the milk (flour/milk/flour/milk/flour).
  3. Pour batter into the loaf pan and smooth the top. Bake at 350º until done.
  4. Mix together the sugar and lemon juice. Slowly pour over the hot bread. Let the loaf cool for at least 10 minutes - then take out of the pan to cool completely.
Notes
  1. This recipe will make 3 nice sized mini loaves (If you have one of those mini loaf pans that makes 4 lovely loaves).
Making it Work https://pioneerintrees.com/
large cupcake

Why Not Carrot Cupcakes?

Ever been at a meeting and had those oily and predictable muffins offered as a snack? Ever wished it was cake? I have. Sadly, no slices of cake are offered up at meetings that I go to … so the other day I decided to make cupcakes for my table group. They LOOK like muffins. They have veggies. Everyone’s happy. 

Generally I decide what I’m baking for a meeting in the morning … and this is not always a good thing, since I don’t have a lot of time. I had seen some kickin’ carrot cupcakes on Insta a while back and of course I didn’t bookmark them – who does that? – so I took a quick look online for a simple carrot cake cupcake that can be made in less than an hour. I found a promising one on the Food and Wine Network website. (And with lots of stars! Very important.) Extra bonus, I loved the title: Take 5 Carrot Cupcakes. I got busy.  

ingredients
beating

Ya Ya … lots more happened, but who has time to take photos when you still have to get ready for work? So … yada yada yada … and then time to make my favourite cream cheese icing recipe. The honey, lemon juice and zest combo make it SPECTACULAR. Really you must make this. 

icing recipe
I think that this is from the LCBO Food & Drink magazine. I recognize the font. (Interesting coincidence that both of these recipes are associated with alcohol.)

Of course any good icing requires a bit of sugar.

icing sugar
I enjoy sifting. And I LOVE parchment paper. It’s my kitchen bff.

 In no time at all you’ve got a decent table snack. 

carrot cupcakes
Normally I’d put a few candied pecans on the top or some extra lime zest, but I was in a hurry …

Since I doubled the recipe (so I’d be sure I’d have enough), I was able to bake up a few extras for the fam me. So glad. 

large cupcake
I often use ramekins when I have extra batter. Very handy indeed.


bottles

Maple Syrup Time Again

Even though day 1 of spring is officially tomorrow, we had a prelude to a spring a couple of weeks ago and as a consequence we have already made 101 litres of maple syrup. I know. That’s a lot of pancakes. But apparently we need more, so I’m heading out shortly to check the lines and collect sap. Before I do that though, I’ll give you a bit of an overview of the operation – purely hobby, by the way, so some of my methods / tools may be a bit questionable to a pro. (And if you work for the CFIA, stop reading this now, because I only sell syrup to friends and family. Thanks very much. Goodbye.)

We (ok, my brother) tapped in mid February this year. It’s a bit of a risky move, because your tapped holes can dry up if there is a long freeze in between runs. We He went for it. He’d collect and boil in the day, I’d come home from work and finish the boil. We’d try to do finishes together, but it didn’t always work out. (Of course, in the March break, when I had LOTS of time to boil and finish, it didn’t run.)

Let me take you through the process with the help of some photos I’ve taken over the years. 

When we’re ready to tap the lines they are already hanging from the trees since we leave them up year round. There is usually some damage to the lines – the deer sometimes like a nibble – so fixing the lines is often necessary. 

tap and fix
We generally fix and tap at the same time, working our way up the line. Hot water, extra tubing and taps are necessary, as is the handy and very sharp knife. 

Tapping takes a day or two – we tap about 300 trees … and several trees have more than one tap. Most taps are connected to tubing (various colours). We do have 20 or so buckets that we use around the house where I don’t want to hang tubing. I can also ask visitors to collect sap from the buckets. It keeps them happy. 

drilling
You need to drill on a slight upward angle. Tony’s a pro.
tapping
Vintage photo of Liam putting the tap into the freshly drilled hole. Afterwards it is hammered in. 
spile
The spile has a wee trough, a hook and a hole for the lid pin to go through. Clever.
After you hang the bucket on the spile you have to attach the lid with a long metal pin. It’s a bit tricky.
drip
Once the tree has been tapped and the spile hammered in, the sap runs immediately.

The tubing runs downhill and into jerry cans that collect the sap. These were a brilliant choice by my dad as the tubing fits perfectly into the vent hole.

saplines
We stretch the lines starting at the bottom of the line, tapping as we go, and raising the line up the trees so that the sap can run easily down the line and into the container.

We collect the sap by exchanging the full cans with empty ones. They conveniently fit in the back of the gator. Clever, eh? 

gator
Cousin Tim jets around to collect. There’s a job for everyone!
night
If the temperature stays warm the sap will run at night. So we collect at night. The coyotes can freak you out a bit…

The sap is then transferred into big stainless steel containers. We have about 400 gallons of storage space. 

sap
The sap is poured through the first of many filters.

Once we have enough sap to boil, we light up the fire in the sugar shack and feed the sap down through handy pipes. 

shack
You can see the pipes go into the shack right under the obligatory OMSPA sign.

The procedure in the sugar shack is pretty basic. Boil the hell out of the sap until all that’s left is syrup, then filter it and bottle it. The machinery is pretty spectacular though! 

pans
These lovely pans make incredible syrup. They’re made in Quebec by the pros.

The slow work is feeding the fire, skimming the foam, checking the levels and collecting more sap. As it boils down we pull small batches into the finishing pan which sits beside the evaporator pans. Once we have enough to finish (around 26 litres), we light up the propane under finishing pan and prepare to do a “finish”. 

skimming
As the sap boils in the upper evaporator pan, we skim off any foam that builds up.
fire
Keeping the boil high is important. We have varying theories on the best way to achieve this. I am right of course.
filter
Once the syrup sap reaches a certain temperature in the lower evaporator pans we pull it off, filtering it as we do so into the finishing pan. This is the second filtering. It’s critical. See the sediment?

This final part is the art of it all. The syrup is boiled in the finishing pan until a certain temperature is reached. This stage of the work involves beautiful caramel bubbles, measuring the Brix (sugar content) with the hydrotherm and taking it off at just the right time. The syrup is poured through its final set of filters as it goes into the bottling pan. 

caramel
final filter
done
hydrotherm

If you boil the syrup too long and the sugar content is just too high, the syrup will crystallize. Even though it’s pretty and can be used to teach Grade 4 kids in their rocks & minerals unit, it’s a waste of syrup and very disheartening. I’ve become better at finishing now, so I haven’t had crystals in a few years. 

These are my sample bottles that sit in the window. One sample for each finish. The crystals formed within a month.

Making maple syrup is a LONG process. Fun fact: it takes 40 litres of sap to make 1 litre of maple syrup. That’s why it’s a labour of love, and why I’ll smack you if I ever see you leaving maple syrup on your plate.